You may have seen them in movies, or gracing the counter in retro-style cafes:
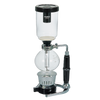
Coffee siphons, also known as vacuum brewers or vac pots.
At first glance, these brewing contraptions look interesting, but many people may wonder how on earth they work, or even what they are used for in the first place. In this article we will briefly take a look at the background of coffee siphons, as well as give you a brewing recipe, explaining the whole brewing process step-by-step!

Both spellings are correct and used mostly interchangeably, with siphon being the 'original' spelling, and syphon being introduced later. However, siphon is more common in British English, so here in Europe we will use this spelling for consistency.
The History of Coffee Siphons
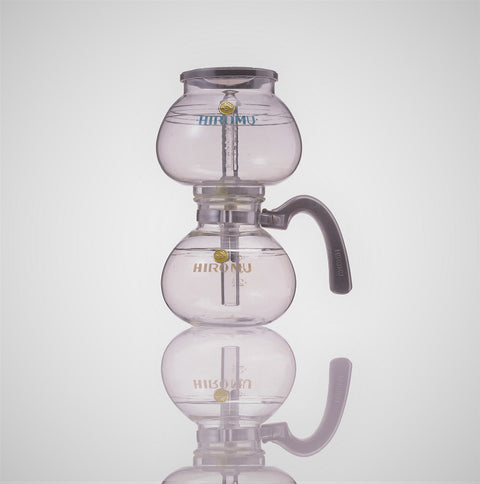
HARIO has a long history when it comes to coffee. It started all the way back in 1948 with, you guessed it, a siphon, namely the HIROMU.
Coffee siphons themselves are a lot older than that though. They are said to be invented either in Germany in the 1830s or by the Englishman Robert Napier around 1840. Whoever can ultimately take the credit, the coffee siphon started gaining popularity throughout Europe from the 1840s onward, and was introduced to other places like the United States and Japan in the early twentieth century. The brewing method saw popular use in the West up until the middle of the 20th century. The device has however remained popular in countries like Japan, as well as being 'rediscovered' and appreciated by coffee lovers for its aesthetics and clear brew.
How Coffee Siphons Work
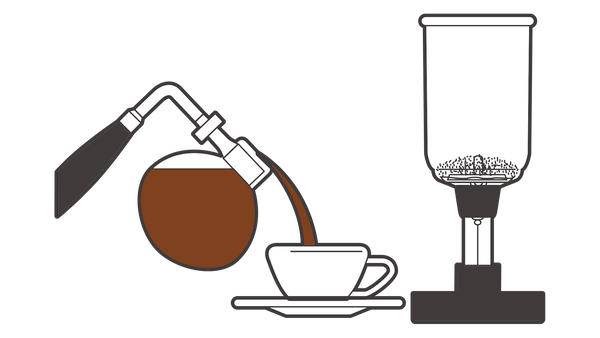
The coffee siphon works, as its other name of vacuum brewer may suggest, by creating a vacuum.
Water is inserted in the lower bowl and brought to a boiling point. As the water boils, it starts to turn into water vapour. The pressure of the vapour in the lower bowl increases, and when it exceeds atmospheric pressure, it pushes the more dense liquid water up into the upper bowl, which contains the coffee. As long as the pressure is maintained (i.e., the heat on the lower bowl is maintained), the liquid will stay in the upper bowl. Once brewing is done (around 40-60 seconds), the heat source is removed, and with the help of gravity and the pressure difference, the water moves back through the filter into the lower bow, ready to be served!

Characteristics of Coffee Siphons
One of the main characteristics of the coffee siphon is the full-immersion brewing. Simply put, it means that the coffee and the water will be in full contact throughout the brewing process, similar to, for example, a French Press.
However, unlike with the French Press, the coffee siphon utilizes the air pressure from the vacuum created in the lower chamber to pull the brew back down through the filter after it has been immersed for a while. This allows the siphon method to properly extract more flavours than a French Press can.
Another characteristic is the fact that the siphon offers a high temperature extraction method. As opposed to other brewing techniques, the water stays at a relatively high temperature throughout the whole brewing process. First it is boiled, and moves up to the upper chamber, where it mixes with the coffee. It will lose a little bit of heat there, but once it goes back down, it will heat back up again slightly, making it quite distinct from other brewing methods.
Lastly, and not unimportantly, it looks great, both on the shelf as well as in action. The unique contraption definitely makes for a good conversation starter, and the movement during the brewing process is something not seen in any other brewing method.
The coffee siphon really has something for all senses: the simple but involved hands-on brewing method; the sights and sounds of the coffee moving up and down; the smell of the brew, and of course the taste of a perfect cup of coffee.

Dosage per cup (100ml) of coffee:
10g coffee
120ml
Time: 40~60 seconds brewing time.
Tools:
- A coffee siphon
- Coffee siphon filters
- The HARIO Technica siphons come with a cloth filter and cloth filter holder in the box, and the HARIO NEXT siphon comes with both a cloth filter and metal filter.
- Depending on your preferences, there are also paper siphon filters and even stainless steel filters available.
- A heat source
- The HARIO Technica and NEXT siphons come with an alcohol lamp in the box.
- Separate alcohol burners can also be found here.
- If you plan to use your siphon frequently, there are also electric alternatives, like HARIO's Smart Beam Heater.
Tips:
Brewing with a siphon may seem intimidating at first, but worry not! While it is a little bit more involved than 'regular' filter coffee, using a siphon is actually fairly straightforward!
Instructions
Step 1:
Boil water in a kettle. (While it is possible to simply heat it with the burner, boiling the water ahead of time speeds things up considerably.)
Put the filter into the upper glass bowl. The filter has a chain that you need to pull down through the tube, and attach at the bottom.
NB: The HARIO Coffee Siphon has a top lid that also functions as a stand for the upper glass bowl.

Step 2:
Add ground coffee (about 10g/cup) to the upper glass bowl.
NB: It is also possible to add the coffee directly to the boiling water when it comes up to the upper bowl in step 6, but for this recipe, we will add it in now.

Step 3:
Carefully pour the boiling water into the lower glass bowl (about 120ml/cup). Make sure to carefully dry off the outside of the glass.

Step 4:
Light the alcohol burner (or turn on your electric beam heater) and carefully place it below the lower bowl.
NB: When filling the alcohol burner, make sure to not fill the alcohol to the top, as to avoid the possibility of overflow.
Step 5:
Position the upper glass bowl on the stand at a slight angle.
Keep an eye on the filter's metal chain. Once the water starts to boil, you will see small bubbles coming off this chain. At this point, position the upper glass bowl straight on the stand (press it lightly; don't force it).

Step 6:
The due to the heat, the air in the lower glass expands, and pushes the water upwards to the upper glass bowl. Once this happens, gently stir in the upper glass bowl with a spoon or bamboo stick to properly mix the water and coffee.
NB: A little bit of water will always remain in the lower glass. This is intentional, to prevent dry-cooking.

Step 7:
Leave the siphon and heat source like this for about 40~60 seconds, then remove the heat source.
NB: Make sure to carefully put out the flame if you are using an alcohol burner.
The coffee will now start to drip down back into the lower bowl, through the filter.

Step 8:
Wait for all the coffee to drip down, and then gently remove the upper glass bowl, while holding on to the stand with one hand. Place the bowl on the stand.
NB: The parts may be hot, so be careful and use gloves/oven mitts.

Step 9:
Serve the coffee straight from the lower glass bowl and enjoy your delicious coffee!
Do you have any tips and tricks? Or do you have any questions? The coffee community is a very welcoming one, so don't hesitate to ask in your local shop, or online.
Show off your brewing process by using the #myhario hashtag, or tag @harioeurope directly in your posts!